Showing posts with label diy. Show all posts

Monday, December 19, 2011

It's begining to look a lot like Christmas...


We finally put up the little mantle I made out of scraps left over from the bed head I made for us ages ago, it looks soooo good!

I bought some cute new stockings (at BigW), so now we have a matching set instead of odd socks ;-).

I'm so excited about how it looks! It will be so nice to decorate the mantle for different events and seasons.


Printable Merry Christmas Bunting available through Mother Duck Said: "Let's Party!"


Printable Merry Christmas Bunting available through Mother Duck Said: "Let's Party!"


Now I can't wait to decorate the table. My parents are coming for lunch on Christmas Day, and then on Boxing Day, my parents, and my brother and his family are coming for breakfast.  I'm looking forward to using our Mini Milk Bottles and Stripey Paper Straws for breakfast smoothies! Can't wait!

Printable Merry Christmas Bunting available through Mother Duck Said: "Let's Party!".

Tuesday, April 12, 2011

Sneak Peek!

My latest project will hopefully be finished today! I'm pretty excited about how it's turning out.


Wednesday, October 6, 2010

My Next Project

This was my bed head when I was a girl. It was also my mother’s. I couldn’t bear to part with it, but we didn’t need another bed since we bought new furniture for the boys bedrooms so that their beds matched their drawers, etc...


So after seeing the creative things that are being done with bed heads in blog world, I decided that I would do the same thing with this.

Stay tuned!


Saturday, October 2, 2010

DIY Bedhead!


I paid $20 for a 5 panel door from A & R Second Hand Traders.


I managed to get it in the car.


I gathered my supplies.

Some of the things I used


Using MY new jigsaw (it really is mine! I purchased it with MY pocket money by MYself!) I cut the door down to size, taking a little bit from the top and more from the bottom so that the panels are centered.


Mark cut the posts for me. I think he was a bit nervous about me using the saw, or maybe he wanted to be part of the bed making...


To the back of the door I attached a bit of timber so that the posts had something else to attach too as the door is not solid timber. Then I liquid nailed and nail gunned the posts to the door.


I cut and attached moulding to the top and sides of the door. 


I put on some more moulding and a bit of timber across the top. 

I’m getting excited!


Primed it.

I’m getting even more excited!


Painted it.

Jumped up and down for joy!

Distressed it.
Skipped around the backyard!

Stained the distressed bits (they were a bit white)

By now I'm so excited I'm doing cartwheels! 

...

On the inside anyway!

....

Calmed down and carried the whole thing inside and put it in our room!
Squealed with delight and clapped my hands!

.....


LOVE   IT!!!!

.....


Before


After

Now I need to:
-  make some pelmets for our windows
- finish the quilt I’m making for our bed 
(actually I’m making a bed runner instead of a whole quilt)
- make a couple of matching cushions and our room is all done.

...

I'm soooooooooo pleased with how this has turned out!


...

Linking to Primitive and Proper


Friday, October 1, 2010

The bed that was a door

Yep. This here G-O-R-G-E-O-U-S bed head was once a door.

Charlotte approves too!
Actually she's just waiting for me to leave the room so she can jump on to Mark's pillow.


 I think the door would feel much more glamorous now don't you think?


Click here to see how I made it.


Here's some Before and After shots...

Before


After


and linking to Funky Junk's old door theme

Friday, September 24, 2010

Another Before and After

Our chest of drawers - finally finished. Mark helped me put the handles on (or rather, I helped Mark put the handles on).  I'm really pleased with how they've turned out.

Before


And to refresh your memory, here are the bedside tables...

Before

After


I'm in love with them!

I'll be working on the bed head tomorrow. I hope it won't be long till I can do the 'reveal'!!!


Sunday, September 12, 2010

Before and after!

I am so excited about how these have turned out!!!!

Before
After


Let's see that again!!!!


Before
After

And once more just for the record and because I'm so excited about how they've turned out! Eat your heart out PHL!


Before


After


Here's the big chest of drawers - almost finished - just gotta put the handles on...


Close up view of the handles I bought on ebay...


Click here to see how I did it!

I'm linking to these 'parties'
Primitive and Proper
I made it without my hubby - Shanty2Chic
Remodelaholic


Saturday, September 11, 2010

Bedroom furniture redo

Since we 'upgraded' to a King size bed, we needed to get a King size headboard for our bed. We saw one at Provincial Home Living that we loved, but didn't want to pay almost $1000 for, so instead of buying one, we decided that we'll sell our old bed (on e-bay) and then make a new one.

 I've been obsessively reading hundreds of blogs about making headboards and along the way decided that we should also do something with our bedside tables and chest of drawers to match the new bedhead.  Many of the DIY blogs also feature how to redo furniture. Since I fell in love with the black bed that we saw at PHL we decided to go with black - I'm hoping that it will bring an elegance to our room.


This is a little bit of the bed that we liked at PHL.
I was a bit sneaky and took the pic on my phone.
Not sure if you're allowed to take photos in store...

Bed in white at PHL


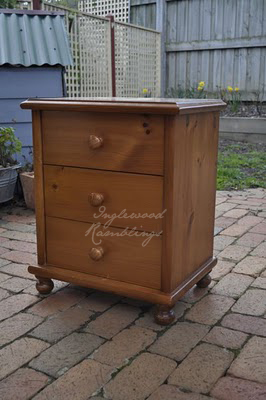
So our bedsides that are chipped and chewed - by our oldest child (not the dog) when he was getting teeth are getting painted and revamped to match the bed.

Bedside - Before

Chest of Drawers - Before


New handles - ebay!


So I began by taking the ipod out to the garage (I must have music to sing along to - Glee is the flavor of the month at the moment).

I cut some moulding and I liquid nailed it to the drawer fronts of the bedsides.


Then I puttied, sanded, primed and painted them.


Spray paint gives a smooth finish,
no brush marks and lines. 

This yellow thing is so handy.
My finger was getting so sore pushing
the nozzle thingie.

So now I'm waiting for them to dry so I can make the final finishing touches with some sandpaper and then put on the handles. Hoping to have them in our room tonight, I'm so over having a cardboard box for a bedside for the past week. So glad today has been a perfect Spring day so that I can paint!  

Will post the final pictures later when they are all finished. Can't wait!

Drawers all painted!


Related Posts Plugin for WordPress, Blogger...